
This guide walks you through the workflows you will use on the Henapp Educare platform. Each section explains a task with clear, step-by-step instructions. Use the screenshot space beside each section to paste your own captures (Windows + Shift + S), or ask your IT lead to add them.
1. First-time login
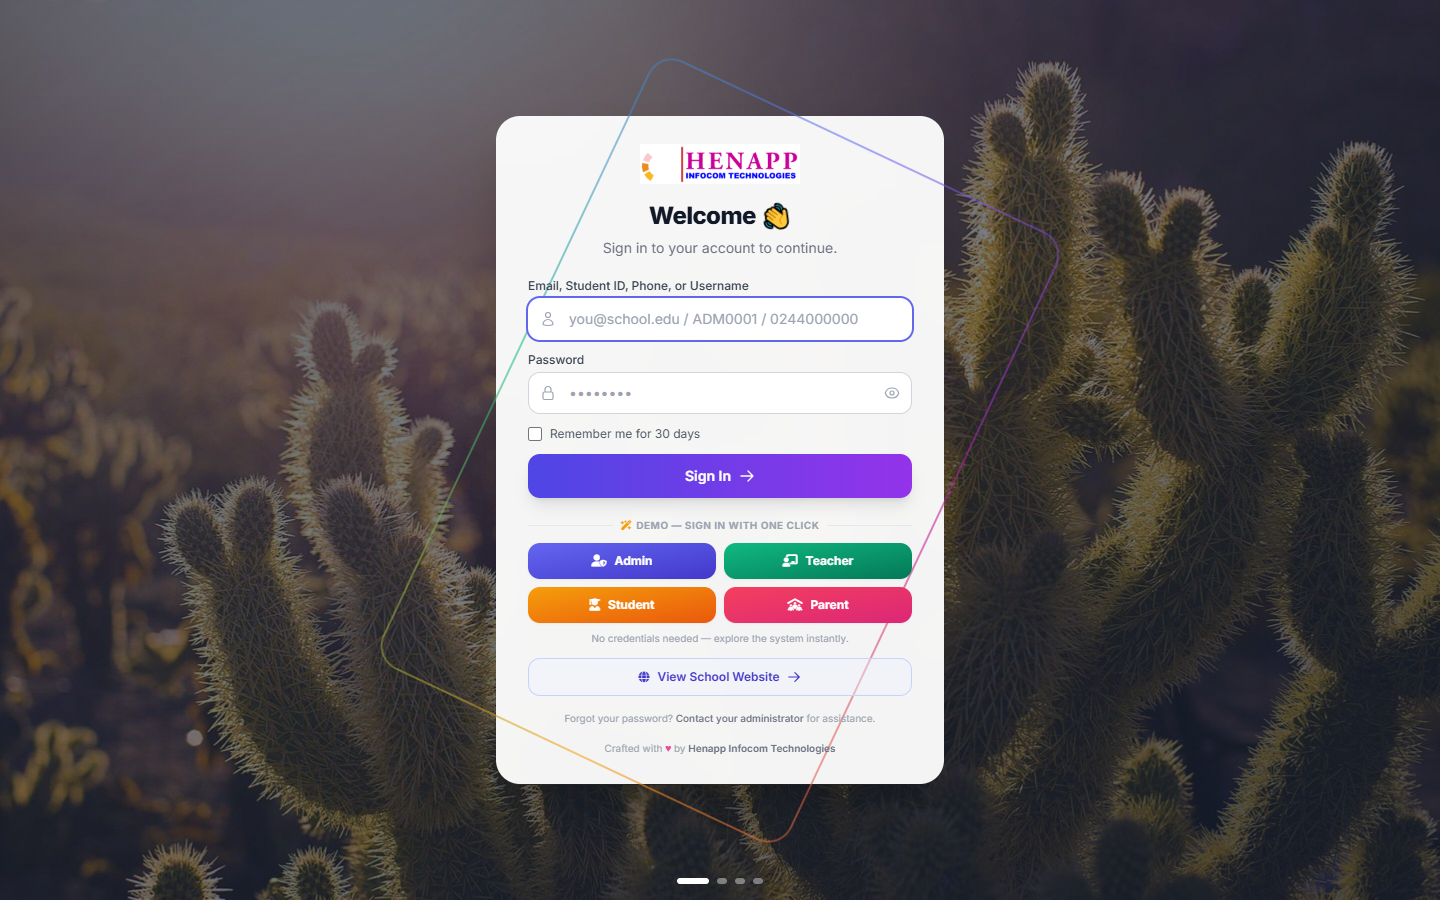
Your school administrator gives you a login URL plus your email/username and a temporary password. The login URL is your school portal address with /login at the end.
Step by step
- Open the login URL in your browser — Chrome, Edge, or any modern browser.
- Type your email address (or your school-assigned username) in the first box.
- Type your password in the second box. Passwords are case-sensitive.
- Tick “Remember me” only on a device you alone use. Leave it unticked on shared or family devices.
- Click “Sign In”.
First thing to do: change your password
- Click your name in the top-right corner of the screen.
- Choose “Profile” (or “My Profile”) from the dropdown menu.
- Find the “Change Password” section.
- Type your current temporary password, then your new password twice.
- Click “Update Password”.
If you forget your password
- Click “Forgot password?” on the login page. If your school has set up email, a reset link is sent to you.
- Or ask your school administrator to reset it — they can set a temporary password for you from the admin panel.
Never share your password. Administrators see real student and school data — treat your login like a bank login. Always sign out on a shared computer.
2. The admin dashboard and navigation
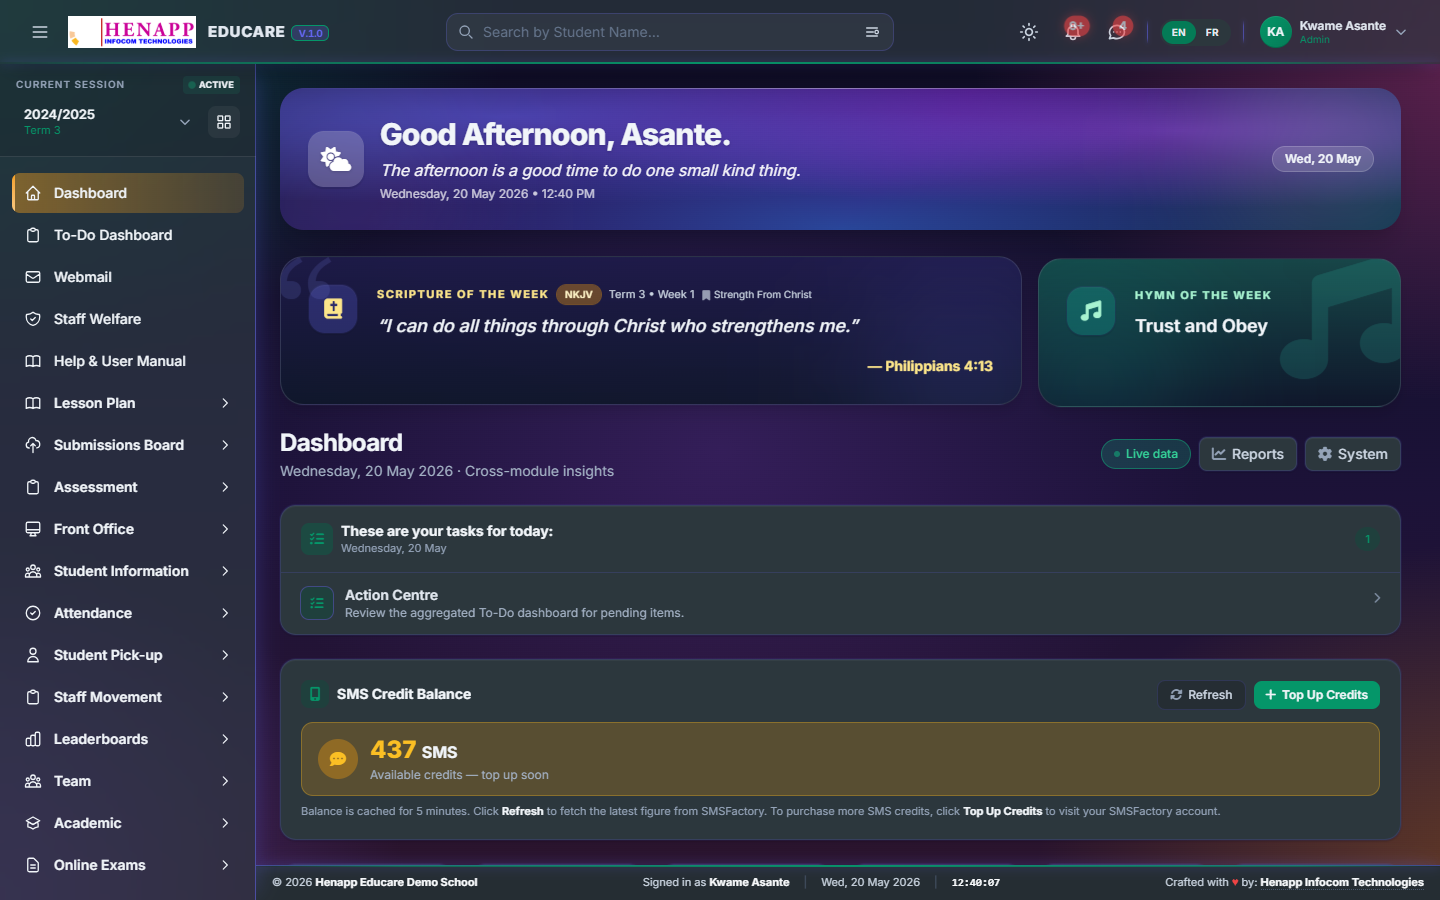
After login you land on the admin dashboard — your home base.
What you see on the dashboard
- Count cards — total students, staff, and parents.
- Today’s attendance summary.
- Outstanding fees and recent payments.
- Upcoming events from the school calendar.
- Recent admissions and recent communications.
The sidebar — your main navigation
The sidebar on the left contains every module the school has enabled. Click a group to expand its items; click again to collapse. The exact groups depend on which modules your school uses.
The top header bar
- Hamburger icon — collapse or expand the sidebar.
- Academic year / term selector — switch the working year and term; all data follows this context.
- Search — find any student, staff member, or page by name.
- Sun / moon icon — switch between light and dark mode.
- Bell icon — in-app notifications.
- EN / FR — language switcher.
- Your name and avatar — profile menu and sign out.
Attendance, scores, invoices, and reports are all scoped to the selected academic year and term. If figures look wrong, check the selector in the header first.
3. Set up your academic year, terms and classes
The academic structure must be in place before anything else. New schools do this on day one; established schools repeat it at the start of each new academic year. Every other module — attendance, fees, scoresheets, payroll, reports — reads the current academic year and current term from this one place.
Almost every list page (invoices, scoresheets, attendance registers, payroll months) is filtered by the current AY and current term. If you see fewer records than you expect — or none at all — check that you're on the right year and term in the header selector first, before assuming the data is missing.
3.1 Academic year
- Sidebar → Academic → Academic Years.
- Click 'Create Academic Year'.
- Enter a name (e.g. '2025/2026'), start date, and end date — for the seeded canonical setup we use 27 Sep 2025 → 23 Jul 2026.
- Tick 'Set as current' and save. Only one AY can be current at a time — setting a new one as current automatically un-currents the previous.
- Past academic years stay in the system read-only — open them any time to pull historical reports, but new invoices/scoresheets always land under the current year.
3.2 Terms (or semesters)
- Sidebar → Academic → Terms.
- For each term, click 'Create Term' and enter the name, start, and end dates. Term dates must sit inside the parent academic year.
- Set the running term as the current one. Same rule as AY — only one term is current; switching unsets the previous.
- Most Ghanaian schools use 3 terms (Term 1 / Term 2 / Term 3); international schools may use 2 semesters. The seeded baseline ships Term 3 (21 Apr → 23 Jul 2026) marked current.
- When a term closes, set the next term as current FIRST, then run promotions if it's also the year-end (see §22).
3.3 Classes and sections
- Sidebar → Academic → Classes & Streams. Click 'Add Class', type the name (e.g. 'Grade 5') and a sort order.
- Every class gets a default 'Main' section the moment you save it — Streams handles attendance, scoresheets and reports per-section, so a class needs at least one. Use the same page to rename Main or add more streams (e.g. Grade 5 → A, B, C).
- Set the homeroom class teacher AND an optional Assistant under Academic → Class Teachers. The assistant gets the same attendance / student-list access as the primary teacher.
- Sidebar → Academic → Classes.
- Add each class your school offers — e.g. Creche, Nursery, KG1–KG2, Class 1–6, JHS 1–3, SHS 1–3.
- Within each class add sections (“Class 1 — A”, “Class 1 — B”) if you run multiple streams.
- Assign a class teacher to each class — the class teacher owns that class’s register and homeroom views.
4. Adding users — staff, students and parents
Three categories of users, each set up a little differently.
4.1 Staff (teachers and admin)
- Sidebar → HR & Payroll → Staff → Add Staff.
- Fill in full name, email (this becomes the login), phone, and date of joining.
- Assign a role from the Role dropdown — eleven options are available: Admin, Administrator, Principal, Head of Academics, Head Teacher, Local Manager, Teacher, Accountant, Librarian, Transport Officer, Shopkeeper. A staff member can hold more than one role.
- Upload a passport photo if available, then save.
- If email is configured, the staff member receives their temporary login automatically.
- Editing a staff later (HR & Staff → Edit) shows the same Role dropdown so you can change their role; the system preserves additive roles like Exam Coordinator on save.
- The Superadmin role is reserved for the developer and never appears in the dropdown. The form refuses to demote a current superadmin or to elevate any staff to that role — even if a crafted request is submitted.
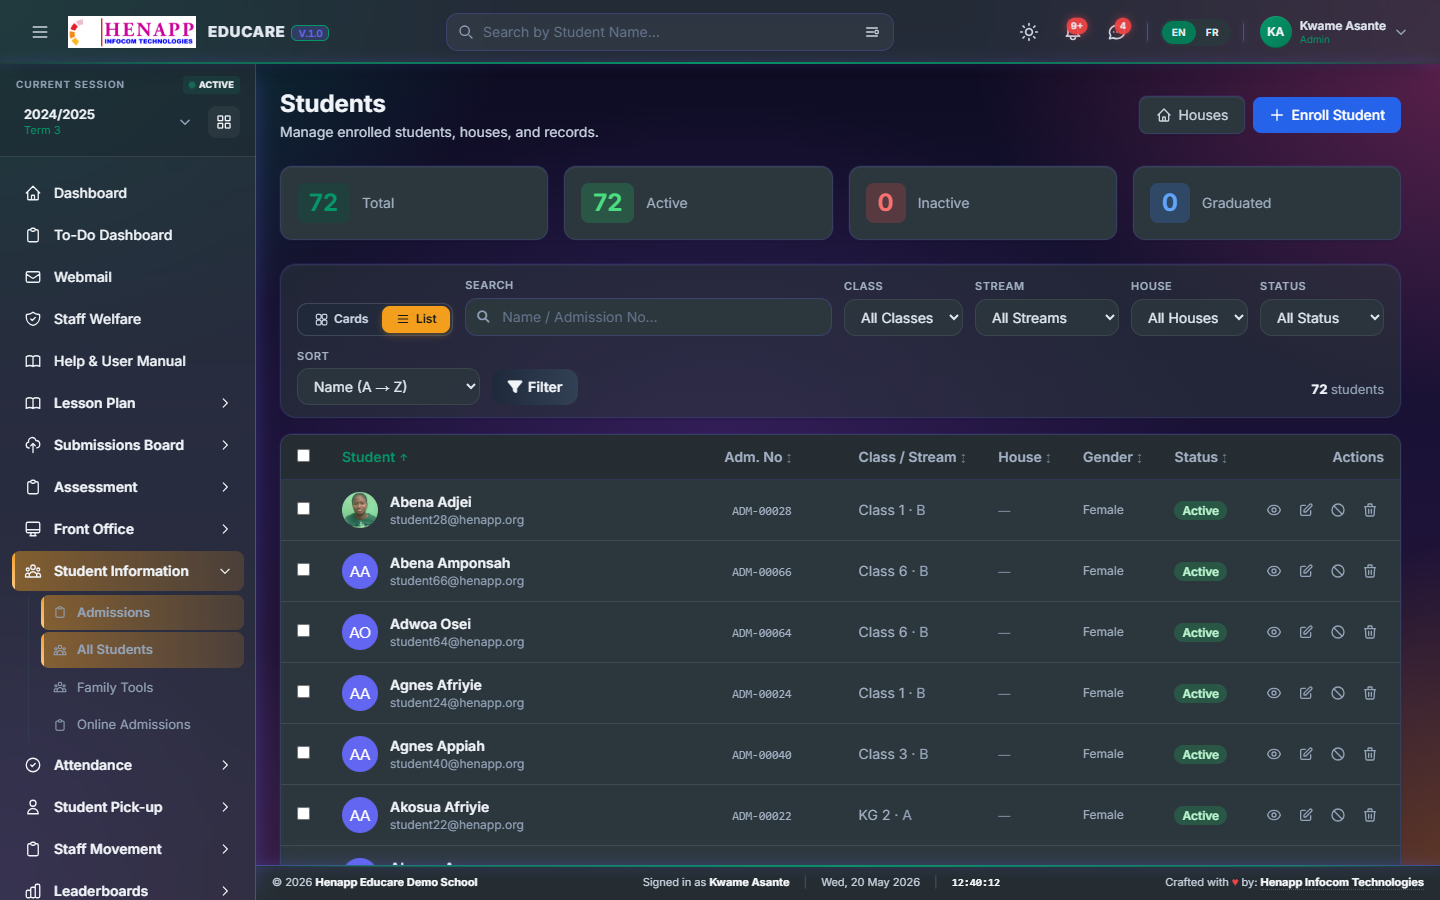
4.2 Students
Three ways to add students:
- Single — Sidebar → Student Information → All Students → Add Student. Best for new admissions one at a time.
- Bulk import — download the template Excel file, fill it in, and upload. Best for migrating an existing roster. The `email` column is optional: rows without an email get an internal placeholder address (noemail-xxxx@no-email.local) that you can replace later from the student profile.
- From an online admission — Sidebar → Student Information → Online Forms → review the application → Enroll.
4.3 Parents / guardians
- A parent account can be created automatically when you add a student — just tick “Create parent account”.
- Or add one manually under Student Information → Family tools.
- Link a parent to one or more students. A parent with several children manages all of them from one login.
5. Subjects and curriculum
- Sidebar → Academic → Subjects → Add Subject.
- Enter the subject name (e.g. “Mathematics”) and short code (e.g. “MATH”).
- Each subject belongs to one class. Add the subject separately for every class that teaches it.
- Assign a teacher to each subject — this drives timetables, scoresheets, and homework.
Every subject belongs to exactly one class. When a form asks for both a class and a subject, pick the class first — the subject list then shows only that class’s subjects.
6. Timetables
A time-of-day schedule for every class.
Build a timetable
- Sidebar → Academic → Timetables → pick a class.
- Click an empty cell (e.g. Monday 8:00am for Class 1A).
- Pick the subject and teacher, then save the cell. Repeat for each period.
Print or share timetables
- Use the Print / PDF button on any timetable page — the PDF carries your school letterhead.
- Class timetable — for the class noticeboard.
- Teacher timetable — distributed to each teacher.
- Student timetable — appears automatically in each student’s dashboard.
7. Attendance — students and staff
7.1 Student attendance
Teachers mark a daily register for each class. As an admin you monitor and correct it.
- Sidebar → Attendance → Class Register to view or back-date a register.
- Absent students’ parents get an SMS automatically (if auto-alerts are enabled). The SMS now names the student explicitly — earlier versions printed a literal '{student}' placeholder.
- Attendance percentages flow straight into report cards.
- Four assignment paths let a person mark a register: grade-level class teacher, grade-level assistant, section-level class teacher, section-level assistant. Any one is enough. Subject-only teachers cannot mark — that's deliberate.
- Students enrolled at the class level without a specific section still show up on the register, but only when the class has exactly one section. Multi-section classes need every student explicitly assigned to a section.
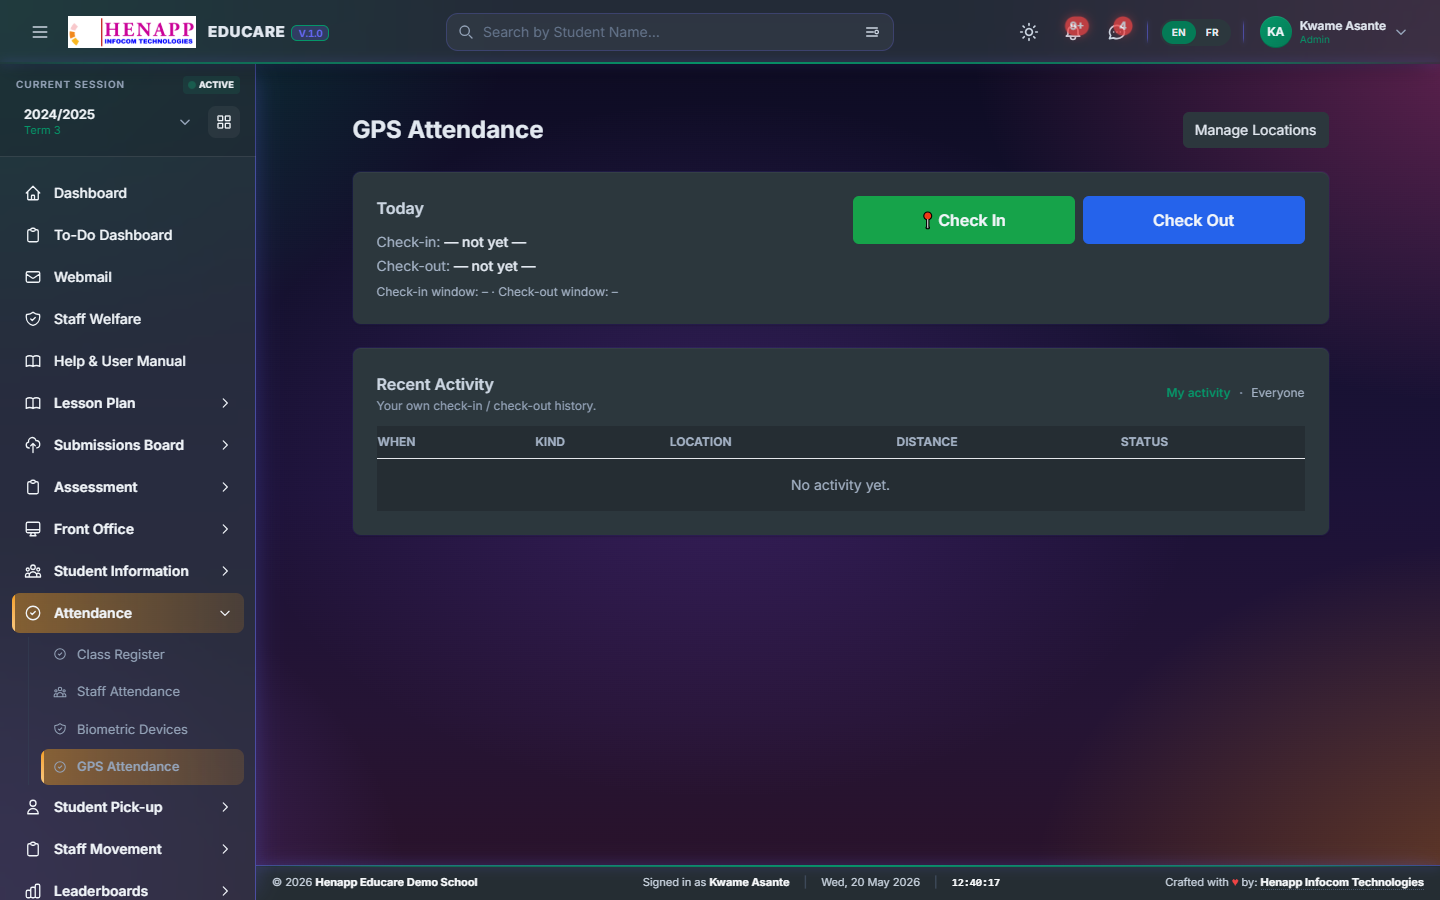
7.2 Staff attendance
- Sidebar → Attendance → Staff Roll records staff clock-in / clock-out.
- Staff can sign in manually, by GPS, or by a registered biometric device.
- Register biometric devices under System Settings → Devices.
- The Staff Movement pages track staff leaving and returning during the day.
7.3 Pick-up rota (weekly per department)
Schools control who is allowed to record student pick-ups at the gate kiosk via a per-week rota — admins decide which staff cover which weeks of the academic term.
- Sidebar → System Settings → Pick-up Recorders.
- Top section: pick a department from the dropdown (or 'All departments' for school-wide).
- The page lists every Mon–Sun week of the current term. The current week is highlighted indigo.
- Each week has its own variable list of duty staff — pick any number per week from the 'Add staff' dropdown. Some weeks can have 1 teacher, others 3 or 5; the layout adapts.
- Week-exact assignments are emerald chips; longer-running assignments that happen to overlap show as sky-blue chips with a 'spans' badge — removing one of those revokes the staff from every week they cover.
- The flat 'Assign a recorder' form below still works for ad-hoc cover (e.g. one Wednesday a substitute is on the gate).
8. Examinations, assessments and report cards
8.1 Continuous assessment
Teachers record class tests, quizzes, and exam scores against assessment components. The Assessment module holds the scoresheets; the Examination module holds exam scheduling and report cards.
8.2 Exam scheduling and online exams
- Sidebar → Online Exams to schedule sit-down exams or build online exams students take on screen.
- Set grade boundaries once per academic year so grades compute consistently.
8.3 Report cards
- Once all scores are in, generate report cards from the Examination module.
- Review, then publish — published report cards appear on student and parent dashboards.
- Every report card is an A4 PDF with your school letterhead.
9. The Submissions Board
The Submissions Board is where teachers upload exam questions for approval, and where you oversee the whole process.
- Sidebar → Submissions Board.
- Each submission window collects question papers from teachers.
- Review, approve, or disapprove a submission — and leave a remark explaining a decision.
- Use the Submission Tracker to see, per window, which teachers have and have not submitted yet.
- Bulk-approve pending submissions, or download all approved papers as a single ZIP.
10. School fees and invoicing
Day-to-day fees are usually handled by the accountant; as an admin you set up the structure and watch the totals.
10.1 Fee categories and structures
- Sidebar → Finance → Categories — add categories such as Tuition, PTA, Books, Boarding.
- Then build a fee structure per class, year, and term — “Class 1 pays GHS 2,400 tuition + GHS 100 PTA per term”.
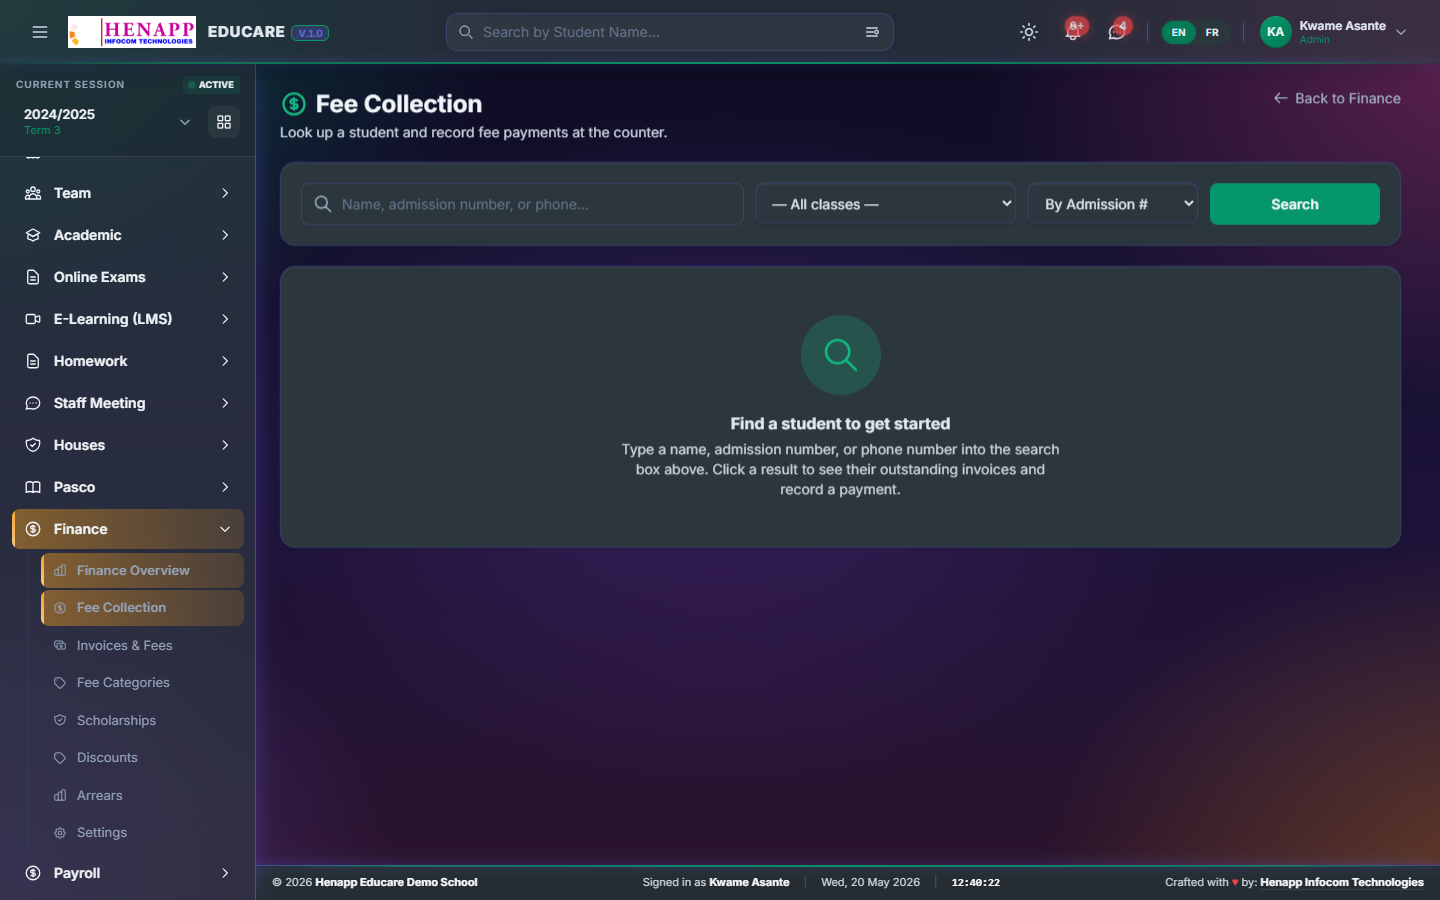
10.2 Generate invoices and receive payments
- Sidebar → Finance → Invoices & Fees → generate for a term — one invoice per active student.
- Fee reminders go to parents by SMS / email if Communication is configured.
- Record a payment against an invoice — a receipt PDF is generated and an SMS confirmation is sent.
11. Payroll
Monthly salary processing with Ghana Revenue Authority PAYE tax and SSNIT social security calculated automatically.
11.1 First-time setup
- Sidebar → HR & Payroll → Salary Structures — set each staff grade’s salary, allowances, and deductions.
- Confirm the PAYE bands and the SSNIT employee / employer rates under payroll settings.
11.2 Run monthly payroll
- Create the pay month, then click Generate — a payslip is built for every active staff member.
- Review totals, edit individual payslips for overtime or bonuses, then lock the month.
- Download payslips in bulk or email each staff member individually.
11.3 Ghana PAYE tax reliefs
Tax reliefs reduce a staff member's chargeable income BEFORE the GRA tax bands apply, so they pay less PAYE. Six standard reliefs from the Income Tax Act 2015 ship pre-seeded with the GRA default amounts; amounts are admin-editable in case GRA revises them.
- Sidebar → Payroll → '1c. Tax Reliefs' tab.
- Top section ('Standard relief amounts'): edit the annual figures — Marriage GH₵1,200, Child Education GH₵600 per child (max 3), Old Age GH₵1,500, Aged Dependant GH₵1,000 per dependant (max 2), Professional Training GH₵2,000, Disability 25% of taxable income. Toggle a row off if your school doesn't honour a particular relief.
- Bottom section ('Who claims what'): a staff × relief matrix. Tick the reliefs each staff has filed a GRA relief card for. For Child Education / Aged Dependant, also type the number of children / dependants in the small box (capped at the maximum).
- Save Relief Claims. The new claims apply to the NEXT payroll month you generate — previously-processed months keep their snapshot.
- After generating: the payslip shows 'PAYE is after GH₵X monthly tax relief' under the PAYE Tax line, and the PAYE report gains a Relief column so the math reconciles for GRA submission.
- Reliefs also flow through the Take-Home Entry (Quick Entry) reverse-calc — the on-screen PAYE / basic figures preview matches what gets saved.
12. Communication — SMS, WhatsApp, email, in-app
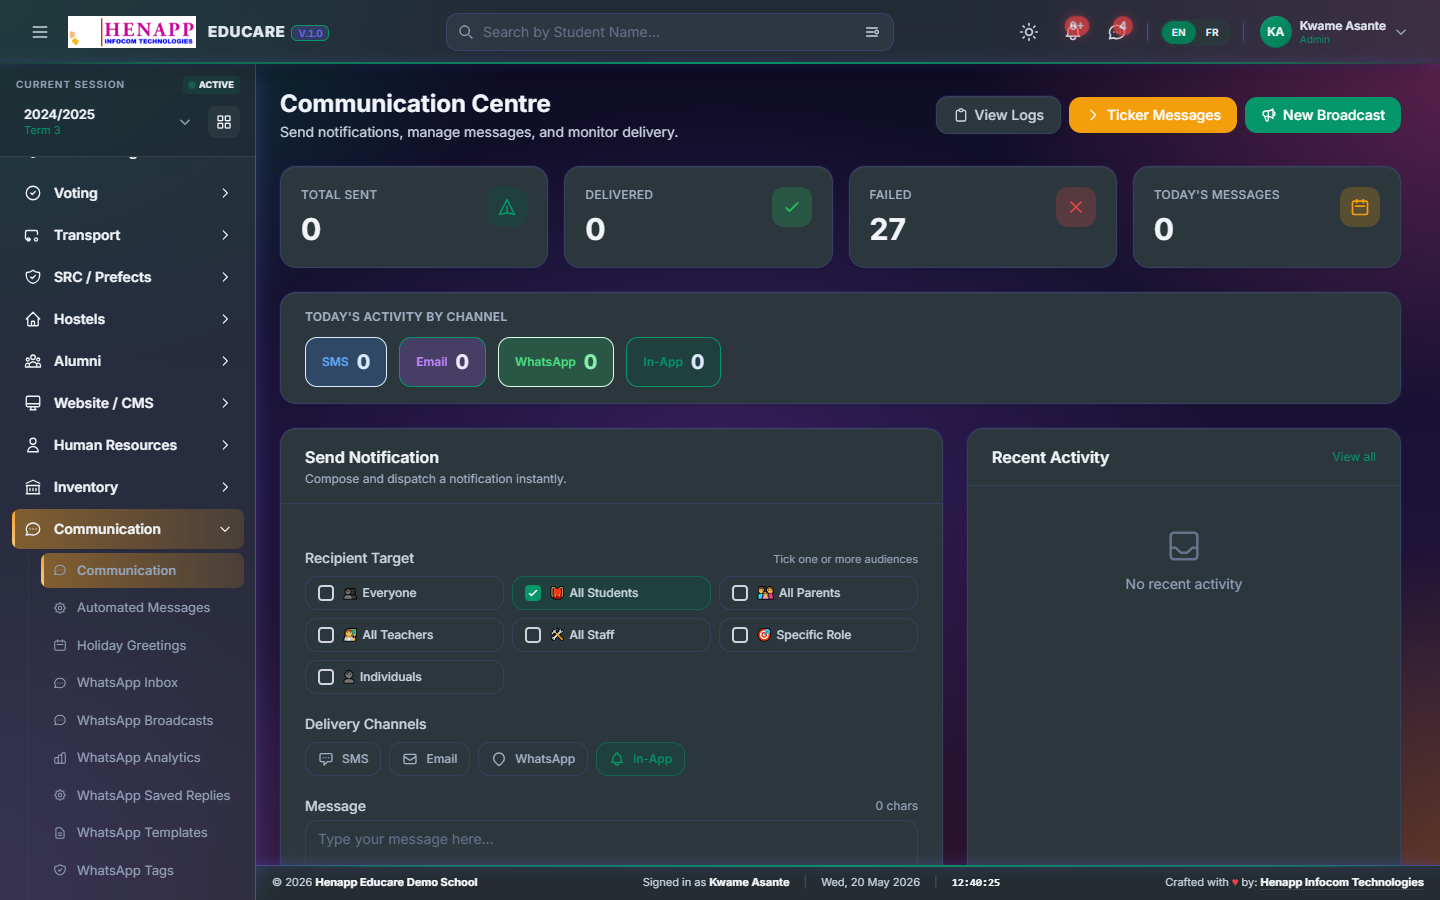
Four channels are available. SMS is the most reliable in Ghana because not every parent has a smartphone or stable email.
- Configure SMS under System Settings — Henapp Educare uses smsfactory.henapp.org; enter the API key Henapp gave you.
- Sidebar → Communication → Compose to send a bulk message.
- Pick recipients — a whole class, all parents, all staff, or a custom list.
- Pick channels — SMS, email, in-app — and send now or schedule for later.
- Automated messages (absence alerts, fee reminders, birthday greetings) are set once and run on their own.
13. Houses, SRC and student life
- Houses — Sidebar → Houses. Create houses, assign students, and run house leadership.
- SRC / Prefectorial — manage council positions and run elections.
- Hostels — room rosters and allocation for boarding schools.
- Voting powers house, SRC, and alumni elections.
14. Operational modules — Library, Transport, Hostel, Feeding, Shop, Inventory, ID Cards
These modules are usually run by dedicated staff. As an admin you enable them, assign the staff, and read their reports.
- Library — book catalogue, borrowing, returns, and fines (run by the librarian).
- Transport — vehicles, routes, and student pick-up (run by the transport officer).
- Hostel — boarding rooms and allocation.
- Feeding — daily meal collection at per-section kiosks.
- Shop — bookshop, uniforms, stationery, and cafeteria sub-shops.
- Inventory — track consumables, fixed assets, and disposals.
- ID Cards — design card templates and print student / staff IDs.
15. Front Office and incidents
- Front Office — log visitors, complaints, and lost-and-found items.
- Incident Log — class teachers record daily classroom safety incidents; admins pull incident reports as PDFs.
- Behaviour — a conduct ledger of notes and warnings per student.
- Staff Meeting — an internal staff noticeboard for posts, comments, and broadcasts.
16. Website / CMS
Your school’s public website is built into the system. Edit it from Sidebar → Website / CMS.
- Pages — edit any page with the rich-text editor; add a French version in the FR tab.
- Blog posts — publish news, results, and achievements.
- Carousel — the rotating banners on the home page.
- The page builder composes a page as a stack of section blocks you can add, remove, and reorder.
- Online admissions submitted on the public site arrive under Student Information → Online Forms.
17. Reports
Every module produces its own reports, and the Reports module aggregates them.
- Class scoresheets and student report cards (Examination).
- Attendance summaries by class or by student.
- Fee collection by term, class, or category (Finance).
- Payroll register and PAYE return (Payroll).
- Every report exports to PDF (A4, school letterhead) or Excel.
18. System Settings
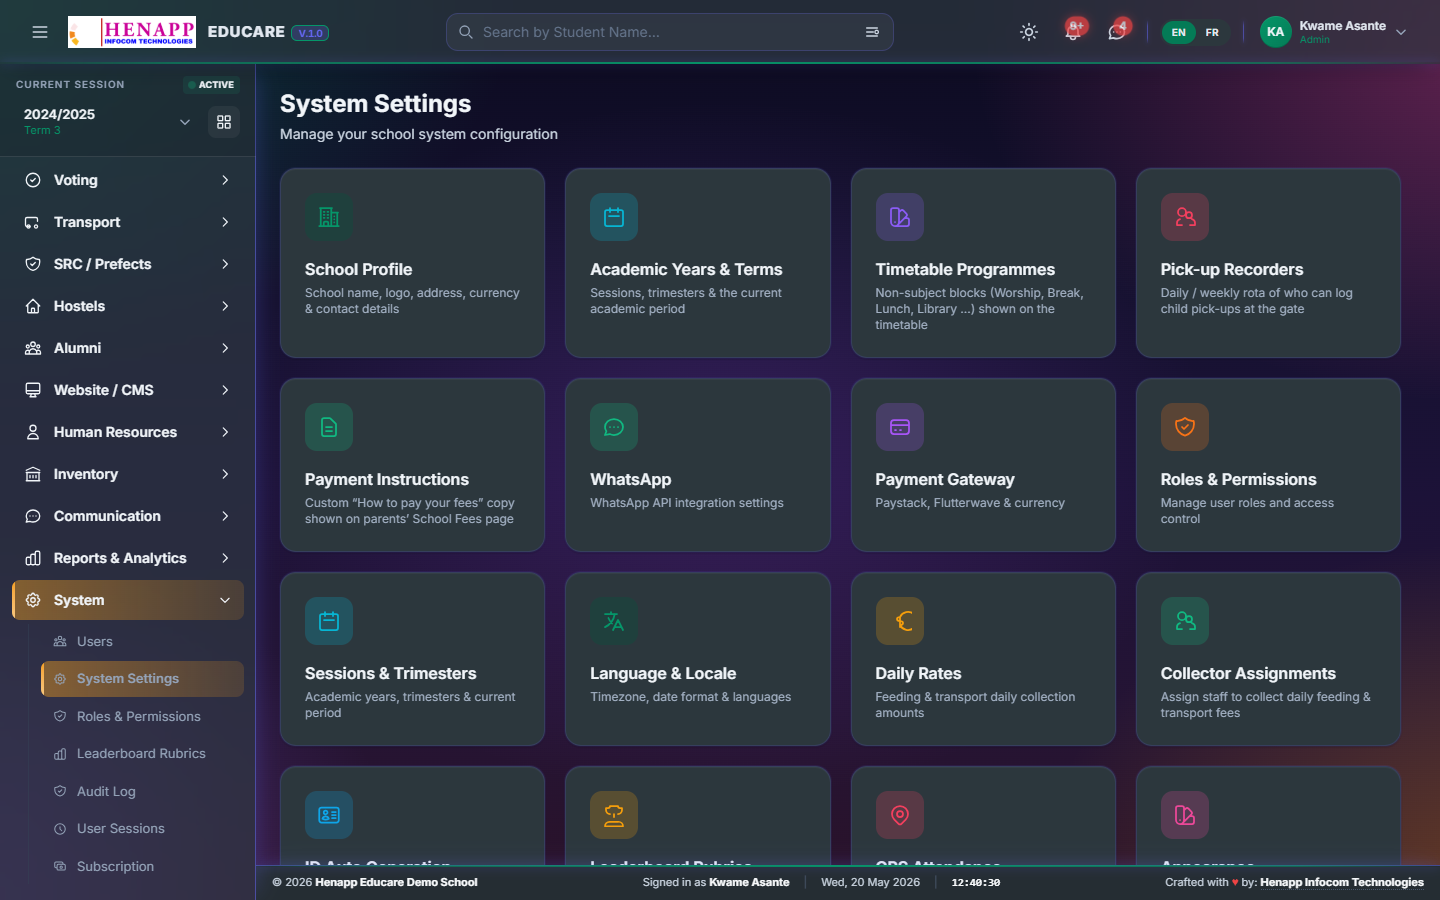
Sidebar → System Settings. The settings that matter most:
- School Profile — name, address, phone, logo, favicon.
- Print — the letterhead image used on every PDF, plus the system footer.
- SMS / WhatsApp / Mail — messaging channel credentials.
- Payment Gateways — mobile money and card payment credentials.
- Appearance — public website theme, sidebar accent colour.
- Sidebar Manager — show, hide, and reorder sidebar items per role.
- ID auto-generation — the format for new student and staff ID numbers.
19. Permissions and roles
Built-in roles should not be deleted. The main ones:
| Role | Can do |
|---|---|
| Admin | Everything except a few platform-only settings |
| Teacher | Own classes, scores, attendance, homework, lesson plans |
| Accountant | Finance, payroll, bootcamp, feeding, shop invoices |
| Librarian | The Library module |
| Transport | The Transport module and student pick-up |
| Student | Their own dashboard, results, and resources |
| Parent | Their own children only |
To give one staff member extra rights, open their staff record → Roles & Permissions → tick the extra role or permission → save.
20. Backups and data export
- Your host runs automatic daily backups, but take a manual backup before major changes (e.g. a new academic year). In cPanel use Backup Wizard → Backup → Database, and keep the .sql file on a separate drive.
- Most list pages have an Export button (top-right) that downloads the current view as Excel — useful for end-of-term archives.
21. Quick reference card
| I want to… | Go to |
|---|---|
| Add a new student | Student Information → All Students → Add Student |
| Add a staff member | HR & Payroll → Staff → Add Staff |
| Generate term invoices | Finance → Invoices & Fees → Generate for Term |
| Run payroll | HR & Payroll → create the pay month → Generate |
| Send a bulk message | Communication → Compose |
| Publish report cards | Examination → generate → publish |
| Edit the public website | Website / CMS → Pages |
| Change the PDF letterhead | System Settings → Print |
22. End-of-session: promotions, graduation and alumni outflow
At the end of an academic year the whole student body moves one class up the ladder. Terminal-class students (typically the highest class — JHS 3 in basic schools, SHS 3 in second-cycle schools, Class 6 in primary-only schools) graduate instead of being promoted. Both flows live on a single page so you can run them in one sitting at end-of-year.
Promotion writes a permanent ledger entry — once moved, a student's old class disappears from their current profile. Publish report cards for the year FIRST so parents have the historical record locked in. The system keeps a per-student ledger of every class move so you can audit later.
22.1 The promotion worksheet
- Sidebar → Academic → Promotions.
- The index lists every class in the current academic year with a 'Promote' button. Click into a class to open its per-class worksheet. Graduate cohort classes (e.g. '2026 Graduates') are hidden from this list — they're terminal and have nowhere to promote to.
- The worksheet has one row per enrolled student with a checkbox (default ticked — opt-out, not opt-in) and a 'Target class' picker.
- The target class is auto-suggested by class level_order: Class 1 → Class 2, JHS 1 → JHS 2, etc. Override on any row that should repeat, transfer, or graduate.
- Untick a row to hold the student in place (repeat the class). Common reasons: insufficient attendance, failed core subjects, parent request.
- Promotion is IMMEDIATE. The instant you click 'Promote selected', every ticked student's class_id updates in the same database transaction as the ledger row — they belong to the new class right away, on whichever screen you open next. No 'switch academic year first' step.
22.2 Graduation (the terminal class)
Students in the school's final class don't get promoted forward — they graduate INTO a dedicated cohort class named after the year, e.g. '2026 Graduates' for the AY that ends in 2026, '2027 Graduates' for the next session, and so on. The cohort class is a real SchoolClass row, auto-created the first time you graduate a student into that year.
- On the terminal class's promotion worksheet, tick the students to graduate and click 'Graduate selected'.
- Behind the scenes the system finds-or-creates '{Year} Graduates' (year derived from the current AY's end_date — for AY 2025/2026 that's '2026 Graduates'), adds a Main section to it on first creation, then re-homes every selected student into that cohort class in a single transaction.
- students.status also flips to Graduated, so attendance registers, scoresheets and fee-generation runs continue to skip them automatically — graduates aren't on the daily teaching roll, they're members of a lookup-only cohort class.
- A second batch of graduations later in the same year MERGES into the same '{Year} Graduates' class — no duplicates. Open that class any time to see the full year-group roster at a glance.
- If a student should have graduated but was missed, you can graduate individual students later from their profile (Student Information → open profile → Graduate).
Graduates need a home. Putting every 2026 leaver into a '2026 Graduates' class means the Alumni module, reunion communications, year-book exports and transcript pulls can all join on a single class_id instead of guessing year groups from graduation dates. It also means an admin who asks 'who graduated in 2026?' is one click away — Sidebar → Academic → Classes → '2026 Graduates' → opens the roster.
22.3 Alumni outflow
Sidebar → Alumni → Members. Every graduated student appears here automatically — linked back to their internal student record via source_student_id, AND now also queryable through their '{Year} Graduates' class membership.
- Members list — every graduated student plus any externally-added alumni (manual entry for pre-system graduates).
- Year groups — graduates of the same year share a '{Year} Graduates' class AND can be tagged into an alumni year group for richer reunion / fundraising workflows. The two coexist; tagging is optional.
- Each member has a public-facing profile (if they opt in) and a private contact card for the school's records.
- Communication — bulk-message a cohort either by the '{Year} Graduates' class OR by alumni year group via Communication → Compose.
- Voting — the Alumni module ships its own elections (alumni executive officers) using the platform's voting engine.
If a graduated student returns — typically as a sixth-former after JHS 3 or for a re-sit year — DO NOT create a new student record. Open the alumni member, click 'Re-enroll', pick the incoming class and section. The system flips status back to Active, moves them out of the '{Year} Graduates' cohort and into the new class, and reconnects to the original student row so the historical scores carry through.
23. Common issues and fixes
“419 Page Expired” when logging in
Clear the site’s cookies and try an InPrivate / Incognito window. If it persists, your IT lead can clear the server cache.
A staff member cannot see a module they should have
Their role is missing that permission. Open their staff record → Roles & Permissions → tick the missing permission.
PDF reports show the wrong letterhead
System Settings → Print → upload the correct letterhead image. The change applies to every future PDF.
SMS messages are not arriving
System Settings → SMS → confirm the API key matches what Henapp sent. Test by messaging your own number. If it still fails, contact Henapp support.
I promoted a student but they still show their old class
Promotion is immediate — class_id updates inside the same database transaction as the ledger row. Three things to check: (1) hard-refresh the page (Ctrl+F5) — your browser may be holding a cached list view; (2) confirm you used 'Promote selected' (a TICKED row) — unticked rows hold the student in place; (3) check Promotion → History — if the ledger has no row for that student, the form's checkbox was off when you submitted.
Where did my graduated students go?
They're in a class called '{Year} Graduates' — for the 2025/2026 session that's '2026 Graduates'. Sidebar → Academic → Classes → '2026 Graduates' opens the roster. You can also find them under Sidebar → Alumni → Members.
A graduated student needs to come back to school
Sidebar → Alumni → Members → open the alumni profile → click 'Re-enroll', pick the incoming class. Don't create a duplicate student record; that would fragment their history. The system moves them out of the '{Year} Graduates' cohort and into the new class automatically.
Email support@henapp.org or visit www.henapp.org. For day-to-day questions, your school administrator is your first point of contact.
24. Switching languages (English / French)
The platform supports more than one language. Your school chooses which languages are enabled — usually English and French.
- Look at the header bar at the top of the screen for a small language toggle (e.g. “EN” / “FR”).
- Click the language code you want. The page reloads in that language.
- Your choice is remembered for the rest of your session.